Thursday, October 30, 2014

OSB Message flow:

Nodes:


1)      Conditional Branching:
               We can use Conditional branching based on specific condition.


2)      Operational Branching:
               If our message flows define WSDL-based proxy services, we can use operation-specific branching is required. When we create an operational branch node in message flow, we can build branching logic based on the operations defined in the WSDL.
              We must use operational branching when a proxy service is based on a WSDL with multiple operations. We can consider using an operational branch node to handle message separately for each operation.

3) Pipeline Pair:
              A Pipeline pair node has a single request and single response in one top-level element. A pipeline pair node has a single (only one) descendant in a message flow. During request processing only request pipeline is executed when OSB process a pipeline pair node. The execution path is reversed when OSB process the response pipeline.


4) Route:
              A route node performs request/response communication with another service. It represents boundary between the request and response processing for proxy service. when a route node dispatches a request message, the request processing is considered complete. when route node receives a response message, the response processing begins. the route node supports conditional branching as well as request and response transformations. 


5) Stage:
            Request , Response pipelines and error handlers can contain Stage nodes, where we can configure actions to manipulate messages passing through the pipeline.


6)Error handler:
          It can be attached to any node or stage, to handle errors at that particular location.


Thursday, October 23, 2014

Routing and Service Call-out in OSAB

--what are the criteria for choosing between one or the other (Routing action or Service Call-out action or Publish action)?

Routing Action - Routing action can be created inside a Route Node only and Route Node is the last node in a request processing. A Route Node indicates that Request Processing will end here and Response Processing will begin. You can not have any node after Route Node in the message flow.

Service Callout - Service Callout is used in real time request-response scenarios (for sync response). If you have a use case where you need to call one or multiple real time request-response services (like sync web-services) then you may use Service Callout action in the message flow. Being a synchronus call, the thread gets blocked until a response is returned from target service.

Publish Action - Publish action is used for Request only scenarios where you don't expect a response back. The nature of Publish action (sync or async) will depend upon the target service you are invoking. If you are invoking an external service through a business service then Publish action with Quality of Service(QoS) as "Best Effort" (default) will work like fire and forget and thread won't get blocked (async call). If you are invoking a local proxy service (proxy with transport protocol as "local") from another proxy using publish action then it would be a blocking call (synchronus call) and thread will get blocked untill the processing of local proxy finishes

Monday, October 20, 2014

Working with Domain Value Maps (DVM) in SOA 11g

Hi, I want to Discuss About  Domain Value Maps(DVM) in Oracle SOA Suite 11g in this post

Domain Value Maps(DVM)  They enable you to map from one vocabulary used in a given domain to another vocabulary used in a different domain. For example, one domain may represent a city with a long name (Mumbai), while another domain may represent a city with a short name (MB). In such cases, you can directly map the values by using domain value maps. 
(or)
In Oracle SOA 11g When ever we integrate the two applications with different names and it gives same information. A general example one application contains a city name as Hyderabad and another application contains the same city name as Hyd, the both the applications are different domains. These type of situations we can use a domain value map between the two domains.

Domain value map values are static. You specify the domain value map values at design time using Oracle JDeveloper, and then at runtime, the domain value map columns are looked up for values.

Domain Value Map Features

Qualifier Support

Qualifiers qualify mappings. A mapping may not be valid unless qualified with additional information. For example, a domain value map containing a city code-to-city name mapping may have multiple mappings from KN to Kensington because Kensington is a city in both Canada and the USA. Therefore, this mapping requires a qualifier (USA or Canada) to qualify when the mapping becomes valid

Qualifier Support Example
Country (Qualifier)CityCodeCityName
USABOBoston
USABELG_NCBelgrade
USABELG_MN_StreamsBelgrade
USANPNorthport
USAKNKensington
CanadaKNKensington

Note: You can also specify multiple qualifiers for a domain value map
            Qualifier Order Support:- A qualifier order is used to find the best match during lookup at run time. Domain value maps support hierarchical lookup. If you specify a qualifier value during a lookup and no exact match is found, then the lookup mechanism tries to find a more generalized match by setting the higher order qualifiers to "". It proceeds until a match is found, or until a match is not found with all qualifiers set to "".
              One-to-Many Mapping Support:- You can map one value to a multiple values in a domain value map. For example, a domain value map for Payment Terms can contain mapping of payment terms to three values such as discount percentage, discount period, and total payment period.
Scenario:   
     In My example we use File Read and write Using DVM Logic 

After Completion of this scenario composite will look like this,


In the above Example Mediater Mediating All Incoming files to File Write Location based on below XSD,

<?xml version="1.0" encoding="windows-1252" ?>
<xsd:schema xmlns:xsd="http://www.w3.org/2001/XMLSchema"
            xmlns="http://www.example.org"
            targetNamespace="http://www.example.org"
            elementFormDefault="qualified">
  <xsd:element name="ListofOrder">
    <xsd:complexType>
    <xsd:sequence>
    <xsd:element name="Order" >
    <xsd:complexType>
    <xsd:sequence>
     <xsd:element name="OrderID" type="xsd:string" />
    <xsd:element name="basedata">
    <xsd:complexType>
    <xsd:sequence>
     <xsd:element name="CityCode" type="xsd:string" />
      <xsd:element name="CityName" type="xsd:string" />
       <xsd:element name="State" type="xsd:string" />
        <xsd:element name="Country" type="xsd:string" />
    
    </xsd:sequence>
    </xsd:complexType>
  </xsd:element>
  <xsd:element name="PricingData" maxOccurs="unbounded">
    <xsd:complexType>
    <xsd:sequence>
     <xsd:element name="Freightamount" type="xsd:string" />
      <xsd:element name="PricingData" type="xsd:string" />
       <xsd:element name="Taxamount" type="xsd:string" />
    
    </xsd:sequence>
    </xsd:complexType>
  </xsd:element>
    </xsd:sequence>
    </xsd:complexType>
  </xsd:element>
    </xsd:sequence>
    </xsd:complexType>
  </xsd:element>
</xsd:schema>

Step 1:  
Create .DVM FILE using  Right click on project -> Select SOA-> Transformation-> Domain Value Map . Give some name to domain value map file and give some name to the domain fields then click OK.

Step 2: Define File Name and Description for the DVM file you created.  Enter the Domain Name and Domain Value .Enter the Domain value to the particular domain name and click on OK


Step 3: Now we will get Domain value Map Editor

How to add columns to DVM
Click on Add Column 
Step 4: While you creating a Domain prompts you below window

The Create Domain Popup window  is displayed  
Enter the Name in the Name field
Select the True if you want to column as a Qualifier
Select Qualifier Order field enter a qualifier number (If you want enabled this field then select as true in Qualifier field)
Click on OK (As discussed in 
Domain Value Map Features)

Repeat same steps to create a Domain Country with Qualifier set to True
Step 5: Adding rows to DVM. Click on Add Domain Values


 Create Domain Value Map as below

Now DVM is used for Domain Value Mapping
1. Create the Project with Empty Composite 
2. Add File Adapter in Exposed Services (i.e used for Read file)
3. Add File Adapter in External Services (i.e used for Writing file)
4. The Two Adapter connect with the Mediator
Step-1:
Drag file Adapter to Exposed Services and do following steps


 Step-2:
Drag file Adapter to External References and do following steps


Step-3:Add the Mediator to the composite.xml and do wiring 


Double Click on Mediator

Click on transform using Icon


If you select the Advanced tab then you will get DVM Functions 
Now add lookupValue in the middle which element do you want lookup


When you double click on the DVM function Popup window will appear 


When you double click on the DVM function Popup window will appear 
Here Main step will raise 
Add dvmlocation, if you click on magnifying glass icon then you will add The domain value map URI.
Add sourceColumnName 
Add targetColumnName
Add defaultValue
Add qualifierColumnName 
Add qualifierValue


Specify values for the following fields in the Edit Function – lookupValue1M dialog:
  • In the dvmLocation field, enter the location URI of the domain value map file or clickBrowse to the right of the dvmLocation field to select a domain value map file. You can select an already deployed domain value map from the metadata service (MDS) and also from the shared location in MDS. This can be done by selecting the Resource Palette.
  • In the sourceColumnName field, enter the name of the domain value map column that is associated with the source element value, or click Browse to select a column name from the columns defined for the domain value map you previously selected.
  • In the sourceValue field, enter a value or press Ctrl-Space to use the XPath Building Assistant. Press the up and down arrow keys to locate an object in the list, and press Enterto select an item.
  • In the targetColumnName field, enter the name of the domain value map column that is associated with the target element value, or click Browse to select the name from the columns defined for the domain value map you previously selected.
  • In the QualifierCloumnName field,enter a value of the domain value map column that is associated with the qualifier  element value , or click Browse to select a column name from the columns defined for the domain value map you previously defied to be qualifier.
  •  In the QualifierValue nter a value or press Ctrl-Space to use the XPath Building Assistant. Press the up and down arrow keys to locate an object in the list, and press Enter to select an item.
Finally Transformation look like below.

Deploy the files in Server

Add xml to particular directory
If the value is correct the output XML file will be like this

If the value is not valid the output XML file will be like this


Configuring Database Adapter in Oracle SOA Suite 11g

This blog gives you a detailed approach to configure a DataSource, JNDI, DBAdapter, and its underlying technologies, facts and common issues.

Every single component used in a SOA Application has to be a service, and this applies to the database also. A database by itself cannot act as a service that can be exposed to the service.  Inorder to use the database in a SOA application, you need to expose it as a service in some way.

Oracle SOA Suite provides you this capability by using a JCA-build wrapper called the DBAdapter.

Using this adapter in your application is quite straight forward, provided it is configured correctly.
Many times, developers come across errors like

Please make sure that the JCA connection factory and any dependent connection factories have been configured with a sufficient limit for max connections. Please also make sure that the physical connection to the backend EIS is available and the backend itself is accepting connections.
The invoked JCA adapter raised a resource exception.
Please examine the above error message carefully to determine a resolution.

at oracle.integration.platform.blocks.adapter.fw.jca.cci.EndpointInteractionException.getFabricInvocationException(EndpointInteractionException.java:75)
...

 While working with the DBAdapters. This is due to incorrect setup of the adapter.
Datasource setup is a onetime step, and it is always good to know the underlying steps and technologies involved.

Before we go to the steps in configuring a DBAdapter, let’s have a look at the various concepts involved in this.

DataSource
 A datasource, as its name implies, is anything that acts as a source for data. Database is a source of data, and it has to be configured as a datasource to the SOA infrastrucure.
Datasource in specific to the Weblogic Server is the connection to the actual underlying data provider.

Connection Pool
WebLogic communicates with the database through a connection pool. The connection pool enables WebLogic to use a fixed number of connections to databases rather than incur the   overhead of constantly creating and disposing of connections.

A data source has a connection pool attached to it, which it uses for connecting to the actual data provider(Database in this case). While creating a datasource, you give a JNDI name, which is  used by the JNDI infrastructure to call the datasource.

JNDI
JNDI, the Java Naming and Directory Interface is a standard interface for the Java based application clients to access the underlying naming and directory services.
This forms a wrapper over the underlying naming and directory services like DNS, LDAP, etc. and lets the client access different services in a standard way.


JNDI is independent of any specific naming or directory service implementations, and allows any service provider implementations to be plugged into the JNDI framework using the standard  Service Provider Interface(SPI).

There are basically 3 steps inorder to setup and configure a DBAdapter in a SOA Application.
1.Configure a datasource for the underlying database, associate a JNDI name to it.
2.Configure an outbound connection pool, and link it with the datasource using the same JNDI name.
3.Use this JNDI name while configuring the DB Adapter.

Step 1 : Configure a Datasource for the underlying Database, associate a JNDI name to it
This step is done using the Weblogic Admin Console. Please make sure your database is up and running before this step.

Soa_domain --> Services --> Data Sources --> New --> Generic Data Source -->


Standard naming  convention for database sources would have a JNDI name prefixed with "jdbc/". You will use this name later to associate a connection pool to this datasource.
Select the appropriate driver


Give the underlying Database details, test the connection in the next screen(not shown here)


Select the server that is running the SOA infrastructure. This makes this datasource to run on that particular server, making this available to all the apps running on that server


Click on finish. After this, you should see this newly configured datasource in the Data Sources summary screen.

Now that the datasource is setup, and a JNDI name associated to it,
you need to create a connection pool for this datasource, in other words connections to this database.

Step 2 : Configure an outbound connection pool, link it to the datasource using the JNDI name
In Weblogic Admin Console,
soa_domain --> Deployments --> dbAdapter --> Configuration --> Outbound Connection Pools --> New


In the above screen, you are giving a new JNDI name, and this will be used in the SOA Suite's DBAdapter configuration wizard to obtain reference to this connection pool.
Now, you can see the newly configured JNDI name in the list of Outbound Connection Pools.
This new connection pool has to be linked to the datasource that you've created before.


There might be a bit confusion in the JNDI names. Here is how it is.
Both the datasource and Connection Pool has their specific JNDI Names

Datasource myDataSource has a JNDI Name
jdbc/myDataSource
Connection Pool has a JNDI Name
myConnPoolForDB, and this connection pool will use the name jdbc/myDataSource as its xaDataSourceName, and hence the linking to the datasource is done

After this setup, you need to redeploy the dbAdapter
Select the DBAdapter in deployments, Update-->Redeploy

Step 3 : Use this JNDI name while configuring the DB Adapter

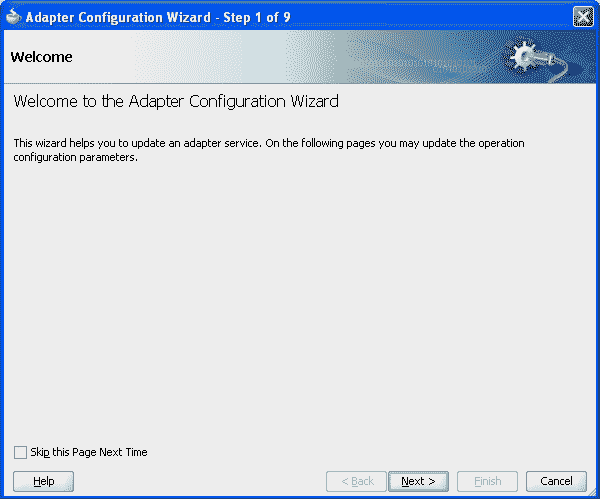
While setting up the DBAdapter in the SOA Suite, in the configuration wizard, use the same JNDI Name


I Hope it is clear now what all goes into a dbAdapter setup.